Summary
TL;DR: The video gives a detailed walk‑through of the B‑17’s A‑2 ball turret—its construction, how a gunner entered, operated, and exited it, plus its combat performance and eventual obsolescence.
Verdict: WATCH — the content is densely packed with technical and operational details that appeal to history buffs and aviation enthusiasts.
Key Takeaways
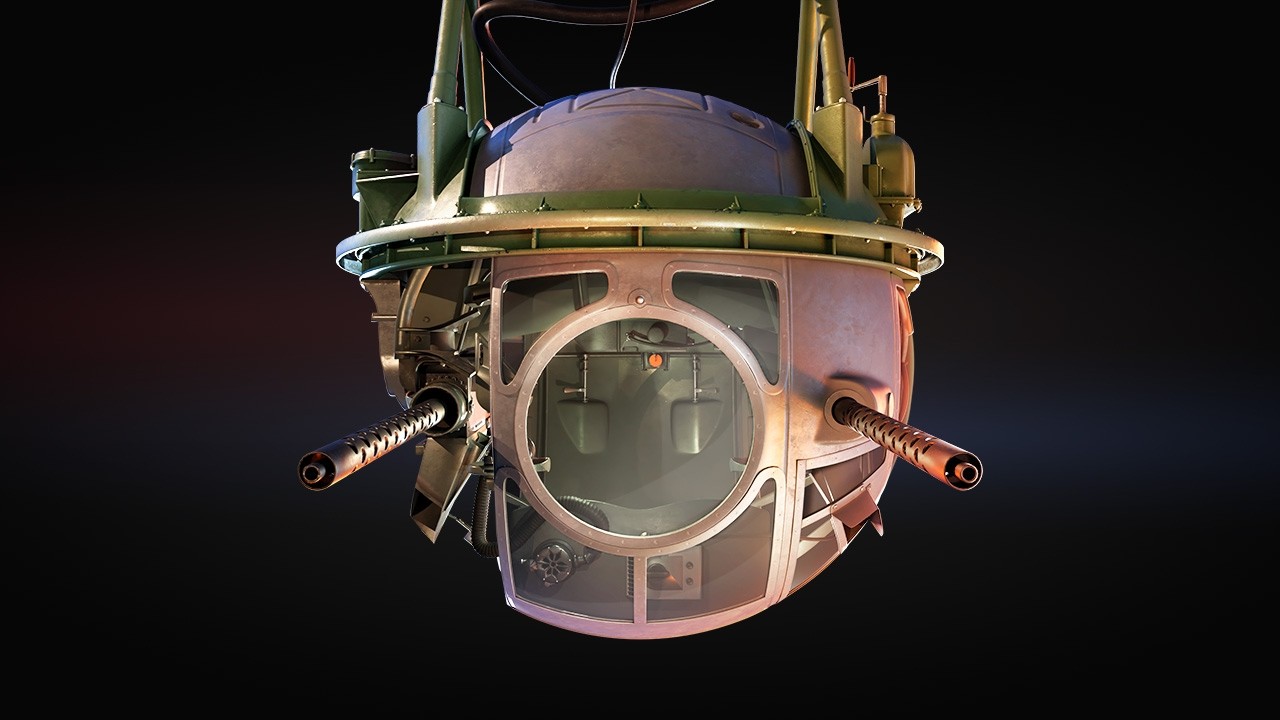
- The A‑2 ball turret measured 44 inches in diameter, weighed 850 lb, and combined steel, armor‑plated steel, and plexiglass for protection and aerodynamics.
- Gunner entry required unlocking the hand‑brake, rotating the turret vertical, opening the hatch, and lowering into a fetal position; the process was forbidden on take‑off/landing.
- Cocking the .50 cal M2 guns was aided by a pulley system because the cramped space made manual pulling impossible.
- A dedicated oxygen bottle on the turret’s harness provided about two hours of supply, and the heated suit prevented freezing at –50 °F.
- Despite its vulnerability, ball‑turret gunners suffered only 6 % of crew wounds, the lowest of any crew position, though the turret was later retired due to remote‑gun advances.
Insights
- Gunner hygiene was improvised: many drilled a tiny hole in a plexiglass window and ran a siphon tube to relieve themselves.
- The turret’s “Ford facing cam” automatically cut power to the guns when the barrel pointed forward, preventing accidental fire into the aircraft’s own propellers.
Key Topics
- Mechanical design and construction of the ball turret.
- Operational procedures for entering, fighting, and exiting the turret.
- Combat effectiveness, survivability statistics, and post‑war obsolescence.
Key Moments
0:19 - Overview of the turret’s purpose and its status as one of the most vulnerable positions.
8:30 - Detailed explanation of the hand‑control unit that lets the gunner rotate and elevate the turret.
16:36 - Description of the turret removal/jettison process and the high manufacturing cost.
Notable Quotes
"When the 8th Air Force surveyed the wound ratios of returning air crew, they found that ball turret gunners received only 6% of crew wounds, the lowest of any crew position." (emphasizes the turret’s relative safety)
Best For
Aviation historians, WWII enthusiasts, and model‑building hobbyists who want an in‑depth technical look at the B‑17 ball turret.
Action Items
- Review schematics or model kits of the A‑2 turret to reinforce the described mechanisms.
- Explore additional resources on the Sperry K‑4 gun sight for deeper understanding of WWII fire‑control computers.